How to draw a moon, step by step
Six simple steps · best for ages 3–6 · free to print
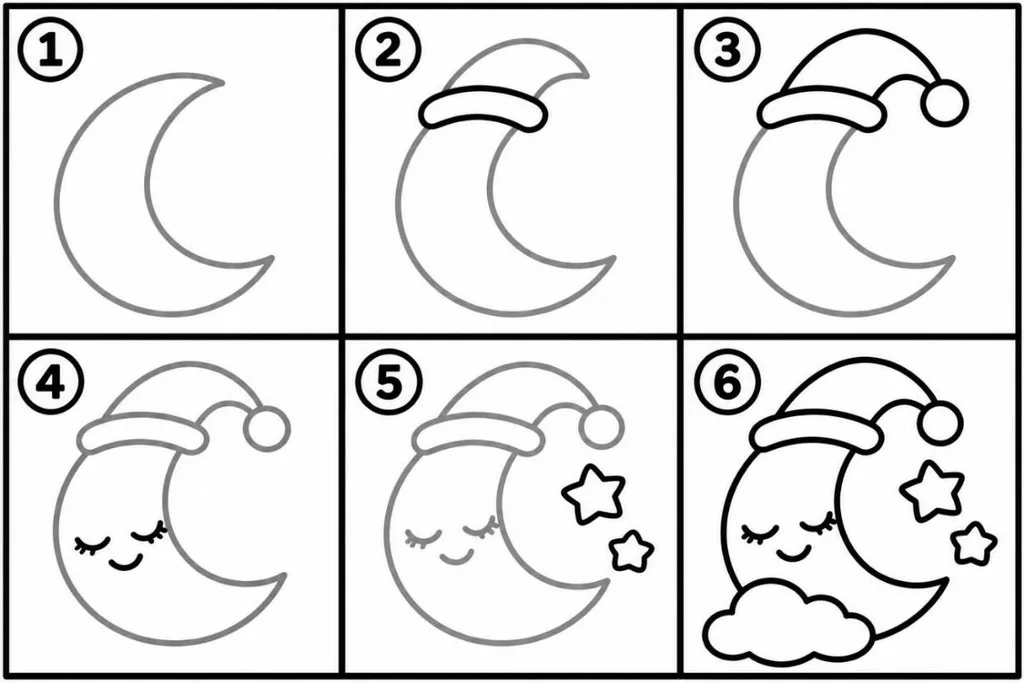
The steps in words
- Draw a big arch with a smaller arch inside it, and join the ends to make a crescent.
- At the top tip, draw a thick, rounded band: the brim of a hat.
- Above the band, add a floppy nightcap that ends in a little pom-pom.
- Inside the crescent, draw two closed eyes with lashes and a small smile.
- On the right, add one big star and one small star.
- At the bottom, draw a soft cloud, then go over all the lines in black.
Tip: The moon can be any size. Just check that its tips are pointy, so it looks like a real crescent.
🌙 Moon coloring pages, ready to color
More step-by-step drawings
Frequently asked questions
How many steps does it take to draw a moon?
Six steps. The first: Draw a big arch with a smaller arch inside it, and join the ends to make a crescent. The last: At the bottom, draw a soft cloud, then go over all the lines in black.
What age is the moon drawing for?
It suits kids aged 3–6 best. The moon can be any size. Just check that its tips are pointy, so it looks like a real crescent.
How do I print the page?
Press "Print or download PDF". The page opens in an A4 preview, ready to print or save as a PDF. On US Letter paper, choose "Fit to page" in the print settings.
Explore more: All how-to-draw pages, Moon coloring pages, Coloring pages, and Color by number.