How to draw a present, step by step
Six simple steps · best for ages 5–8 · free to print
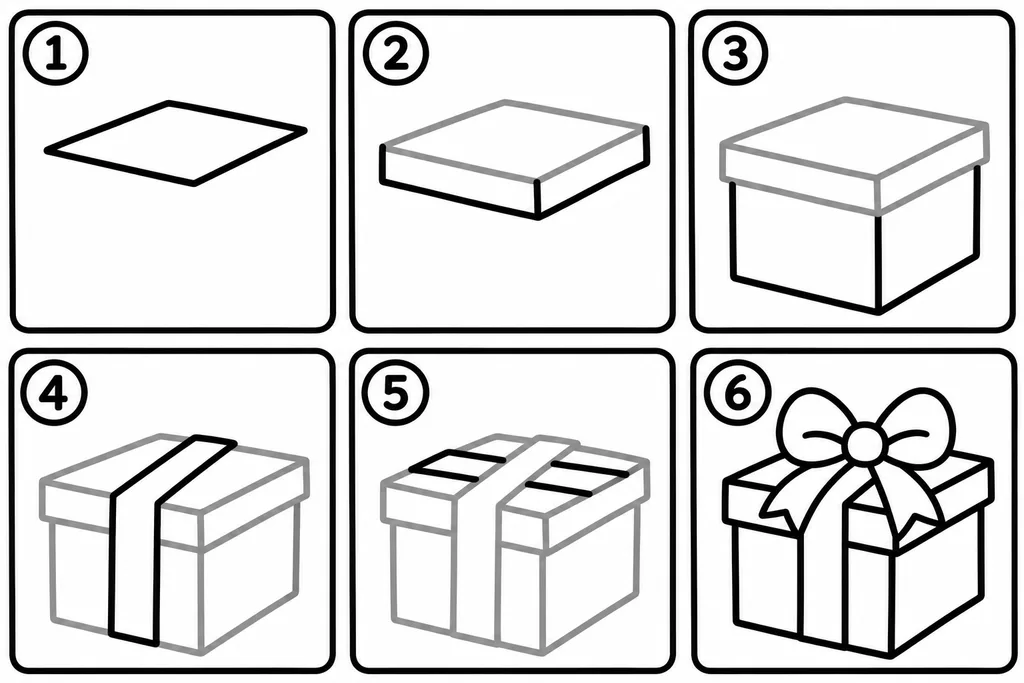
The steps in words
- Draw a diamond lying on its side. This is the top of the lid.
- Under the diamond, add a narrow strip at the front and the side for the thickness of the lid.
- Under the lid, draw the box: two walls, one at the front and one at the side, with a line at the corner.
- Draw a wide ribbon running from top to bottom over the lid and the box.
- On the lid, add a second ribbon that crosses the first one.
- On top, draw a big bow with two loops, a round knot and two ends, then go over everything in black.
Tip: A present suits every celebration: a birthday, Hanukkah or just because. After coloring, cut it out and stick it on a card.
🎁 Present coloring pages, ready to color
More step-by-step drawings
Frequently asked questions
How many steps does it take to draw a present?
Six steps. The first: Draw a diamond lying on its side. This is the top of the lid. The last: On top, draw a big bow with two loops, a round knot and two ends, then go over everything in black.
What age is the present drawing for?
It suits kids aged 5–8 best. A present suits every celebration: a birthday, Hanukkah or just because. After coloring, cut it out and stick it on a card.
How do I print the page?
Press "Print or download PDF". The page opens in an A4 preview, ready to print or save as a PDF. On US Letter paper, choose "Fit to page" in the print settings.
Explore more: All how-to-draw pages, Present coloring pages, Coloring pages, and Color by number.